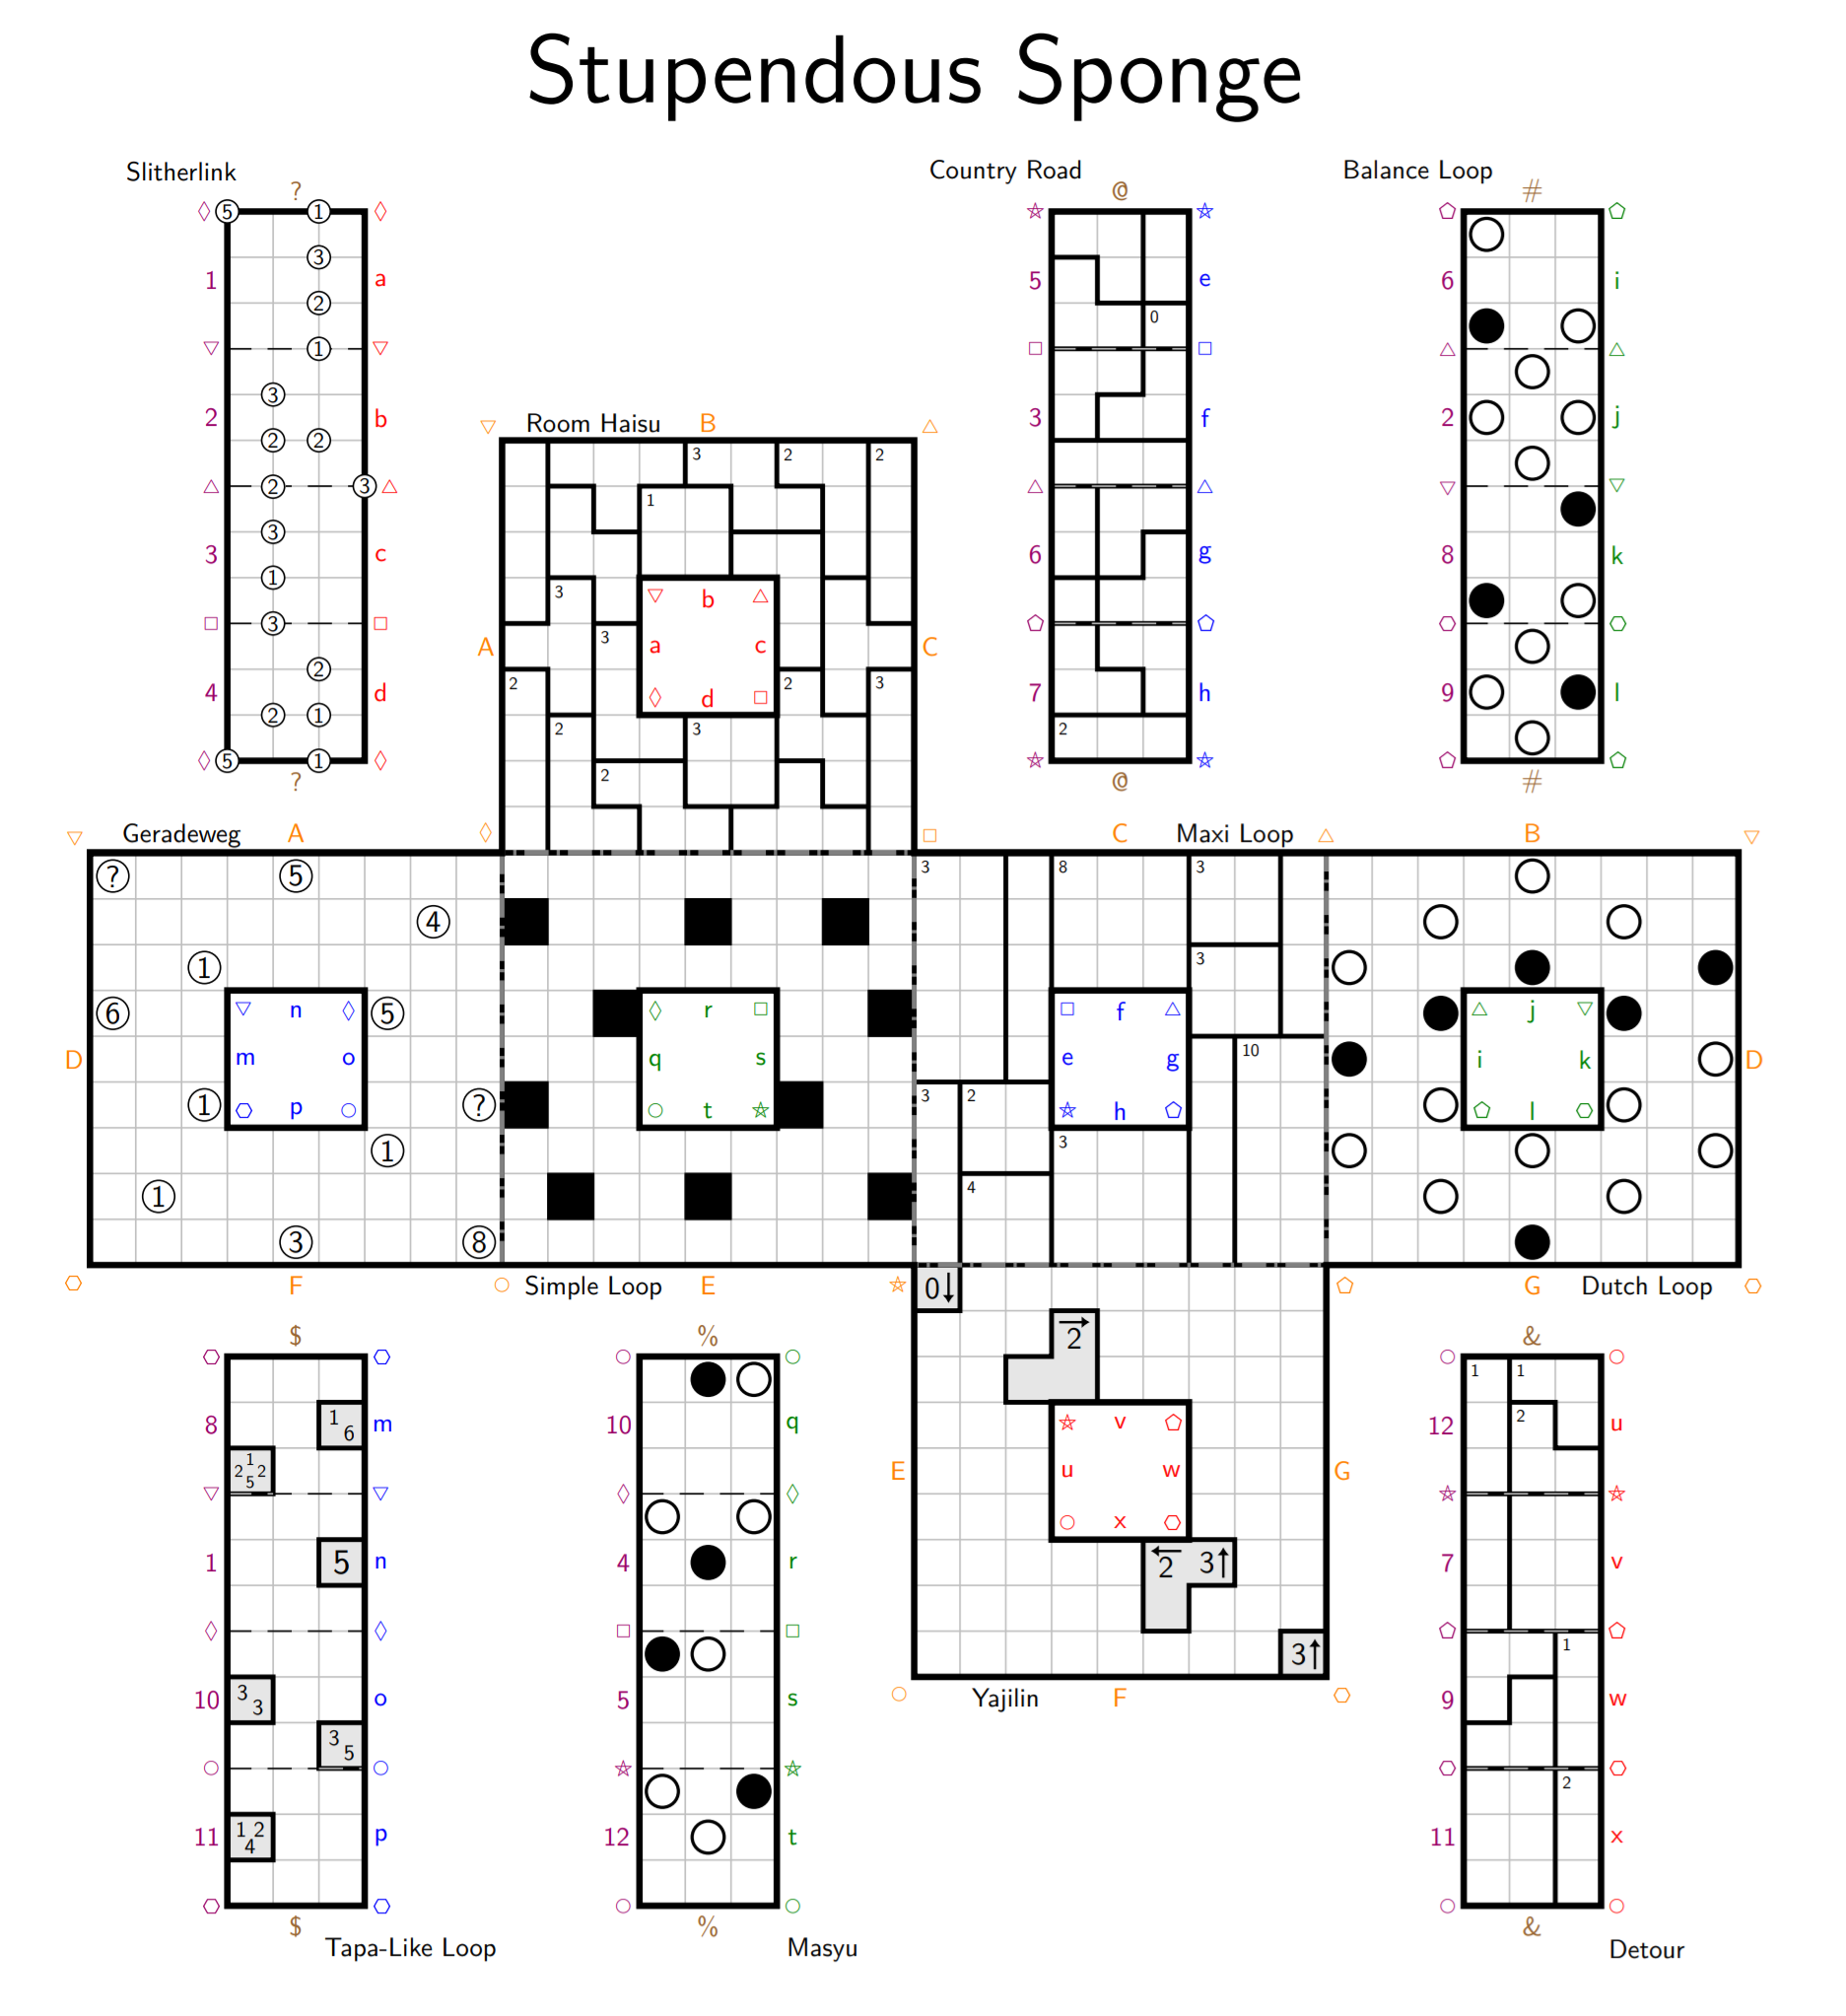
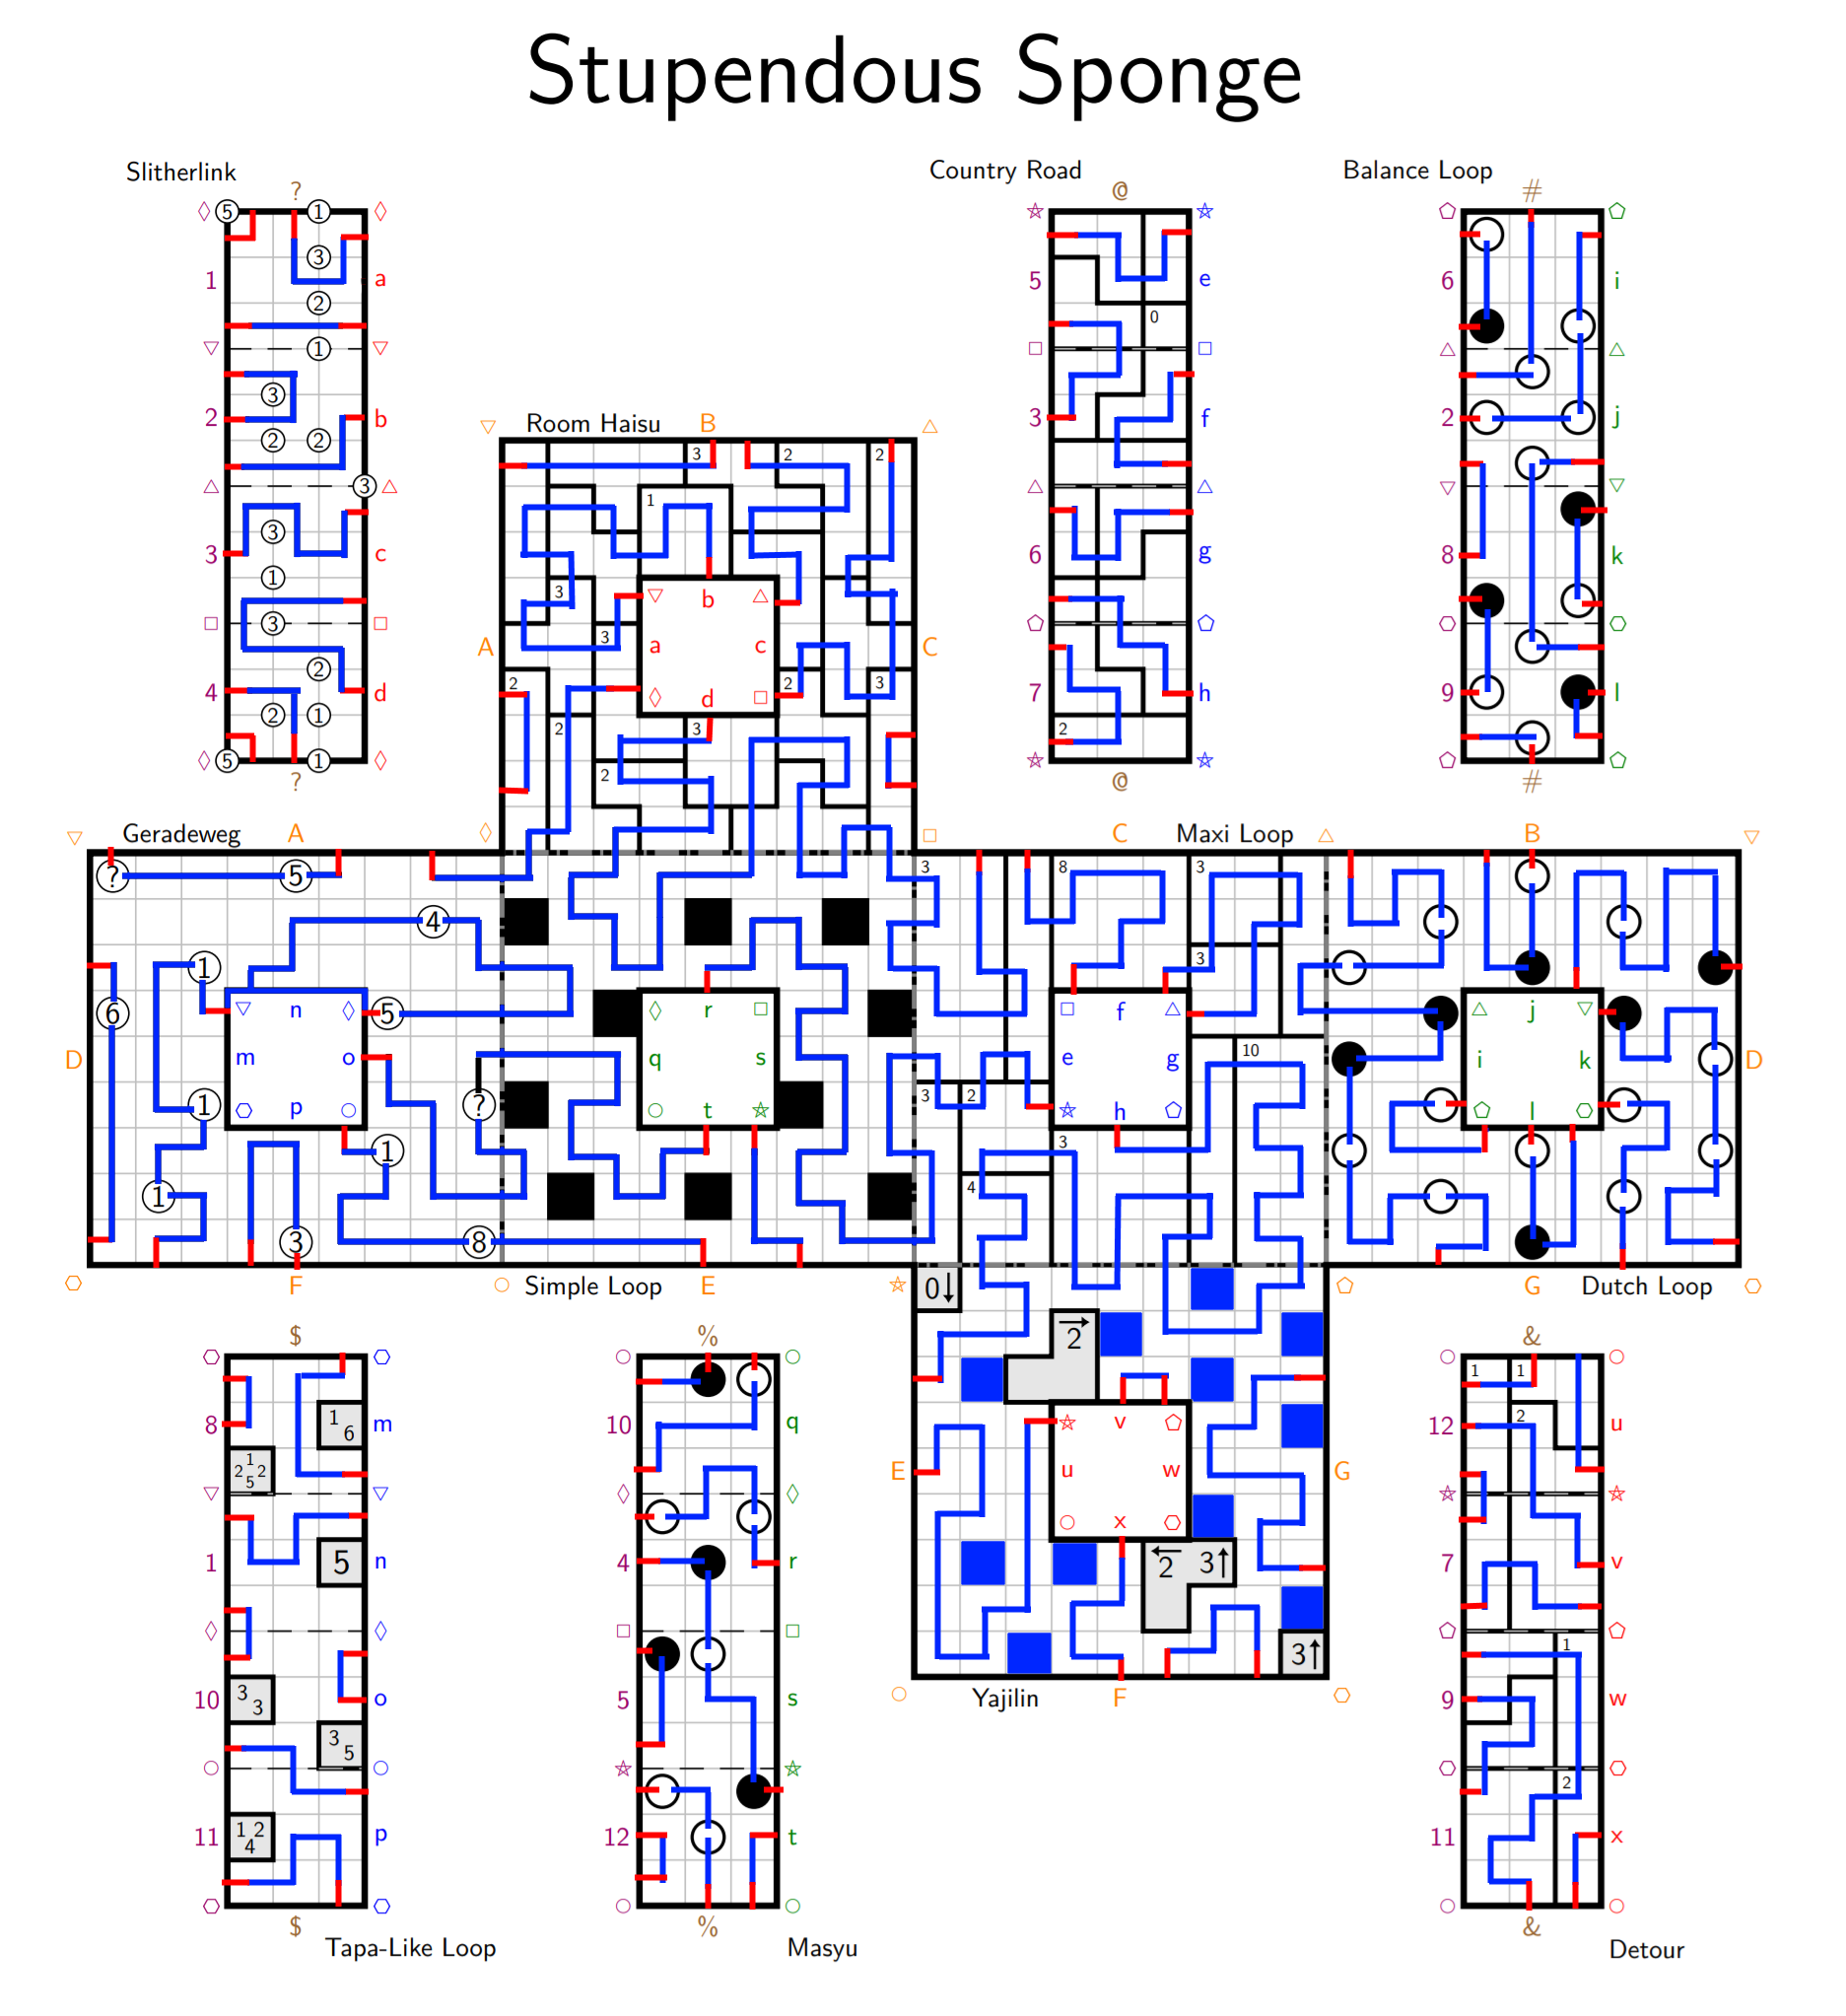
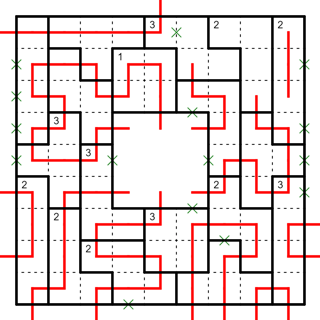
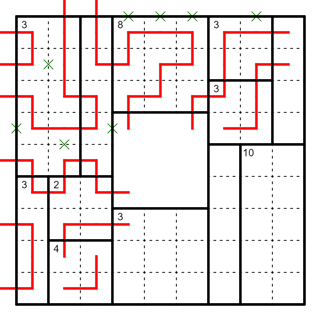
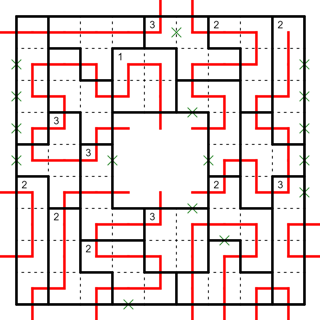
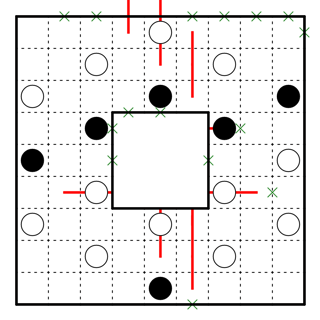
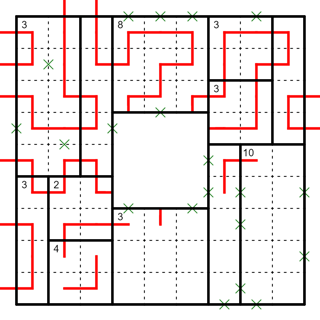
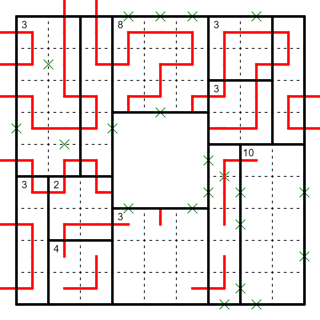
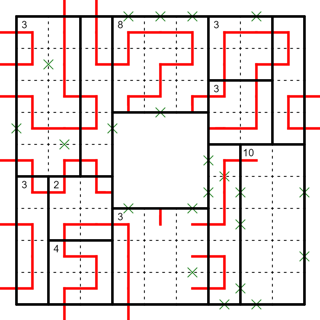
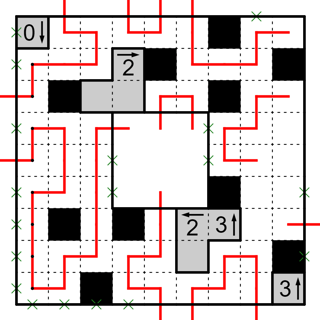
I believe the following is the answer:

Explanation
(Update: Explanation is complete now!.)
Slitherlink
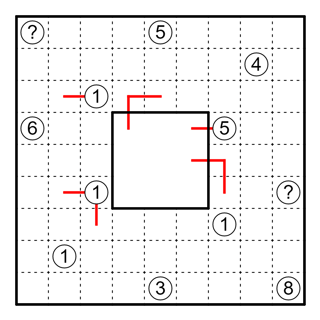
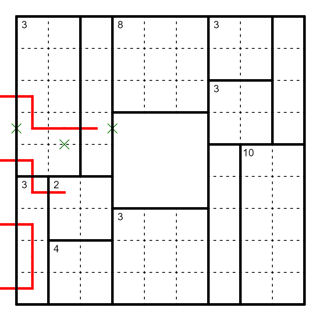
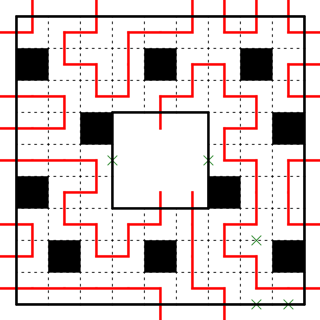
So, we start with the '5' in the lower left corner (and also upper left corner) of the Slitherlink. Note that vertex (with a purple diamond) interacts with two other puzzle genres: Tapa-like Loop and Masyu. The thing about having a '5' in the corner means that out of the 6 cells the vertex touches, 5 of them must be occupied and the cells in which the entry and exit points occur must be adjacent. One of the cells has a white Masyu cell in it and regardless of whether the loop enters it horizontally or vertically, it will lead the loop away from the vertex. Therefore, other than this cell and its immediate adjacent cells, we can form a loop around the remaining three cells. The minute we do so, the '3 3' Tapa clue forces the loop away from the vertex on the Masyu side (occupying R2C1). So, the entry and exit points are found as shown below:


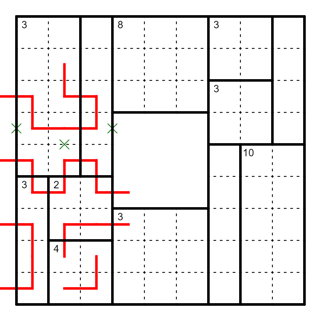
After that, we can make some easy deductions using the slitherlink clues, starting with the '2' nearest to the '5' in the bottom left of the Slitherlink grid. Since both link segments to the lower left are going away from the '2', its top and right must be filled. Using this logic and slitherlink connectivity rules get us to:

Solving Balance Loop
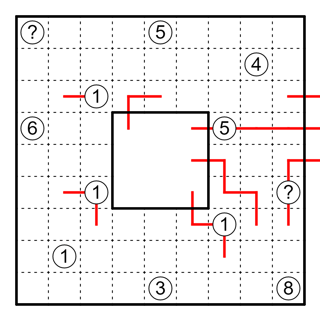
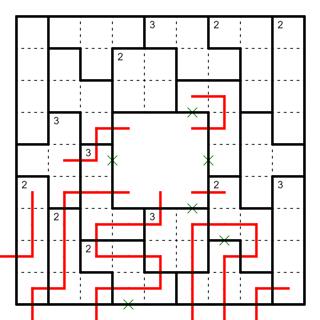
Next, focus on the '1 6' Tapa clue. It shares one long edge with the Geradeweg puzzle along the 'm' edge. On the Geradeweg side, there is a '1' clue that the Tapa clue also sees and that must correspond to the '1' in the '1 6' clue. That means out of the remaining 7 cells, 6 cells must be occupied, so we can fill in the middle 5 cells. This gives us:

Now, focus on the '1 2 2 5' Tapa clue. This Tapa clue must have all the 10 cells it touches filled. One of the '2' clues has already been satisfied. Now, we need to consider this clue in conjunction with the Slitherlink and Balance Loop clues. I have shaded the remaining cells the Tapa clue touches in yellow:


Now, if the '3' clue in the Slitherlink were to either go up or down, then we can never satisfy the '5' clue of the 'Tapa'. So, the '3' clue in Slitherlink must therefore go left and we get:


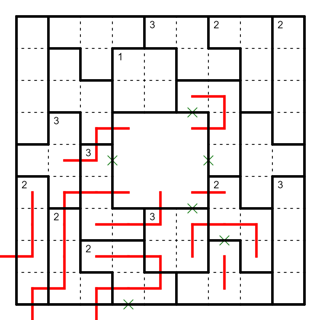
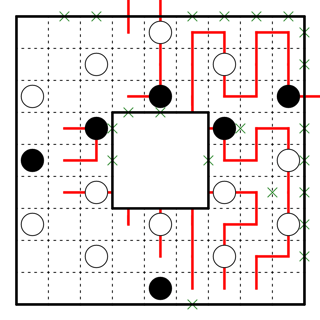
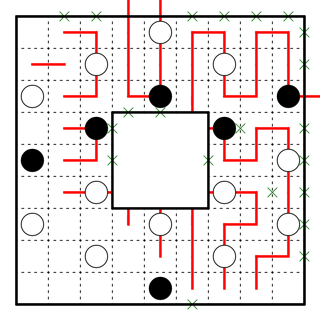
Now, we can focus solely on the Balance Loop. The white circle in R5C1 of the Balance Loop sees a length of 2 to its left (from the Slitherlink grid). Since it cannot go up, it must go to the right. This forces the white circle in R6C2 to go right and down. It cannot have a length of 1 (it would form a loop with the black circle), so it must extend into the Dutch Loop area. This forces the black circle in R7C3 to extend 2 down and 1 right. It also forces the white circle in R5C3 to go up, which then forces other chain deductions until we get here:

Now, the loop segment in R9C2 cannot join up with the white circle or black circle (the black circle would have equal segments or the white circle in R10C2 would be forced into a small loop. So, it must join with the white circle in R10C2 instead. We then get:

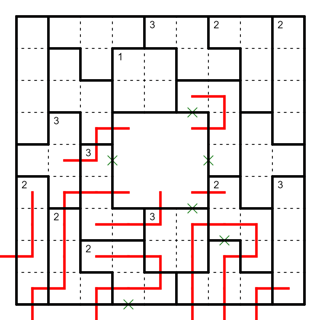
After that, the white circle in R3C3 needs to extend 2 unit cells to meet the length requirement of the white circle in R5C3. The line segment in R2C1 cannot go left to the Country Roads grid because it would be forced to make a loop, so it must extend up. Then, the white circle in R11C1 must go to the left since going down or right will violate its length requirement. This and the following chain deductions complete the Balance Loop portion.

Masyu and Tapa-Like Loop
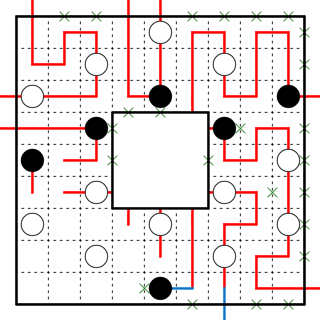
Next, return to the Masyu grid. We can make some easy deductions until we get here. The connection between the Masyu grid and the Simple Loop grid is shown by the blue line.


Using that, we can make some more deductions until we get here.

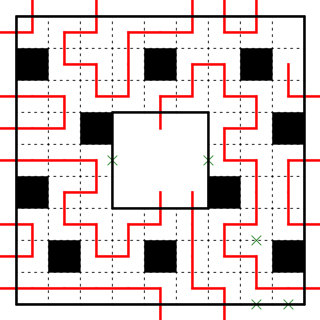
After the deductions on the Balance Loop grid and Masyu grid, the Tapa-Like Loop grid looks like this.

Now, the '3 3' clue has been fully resolved, so using the chain deductions from there will allow us to mostly resolve the area in the bottom part of the Tapa-Like Loop grid. One last deduction to make is the area around the '5' and '1 2 2 5' clue. The left side of the '1 2 2 5' connects to the Slitherlink and that route is completely blocked. So, the loop there must exit through the '5' clue's side. No matter how the loop connects there, it must always go through the top of the ''5' clue. This gets us to:

Geradeweg, Simple Loop and Resolving Masyu
From previous deductions, the Geradeweg grid currently looks like:

The loop segment in R5C7 cannot join up with the '1' clue in R7C7, so that must be the '3' length of the '3 5' clue of the Tapa and the other side which joins up with the '1' must be the '5' length. The loop segment that connects to the '5' clue in Geradeweg must extend 4 cells to the right reaching the Simple Loop grid. From there, we can make a few more deductions to get:


Then, for the next deduction in Simple Loop, we need to look at the Masyu grid first.

Look at the area shaded in yellow. If the loop segment in R2C3 were to turn right, then that area would have an odd number of loop ends left and one loop end would be left unconnected. So, it must go left. This now forces the Simple Loop to look like:

After a few simple deductions, we can reach here.

Then, this forces some deductions on the Masyu side, which fully resolves it.

Simple Loop, Geradeweg and Maxi Loop
The loop end in R9C8 must go up to prevent one cell from being isolated. Now, the Simple Loop grid looks like:

Now, if the loop end in R8C8 were to go up, the cell in R5C9 would be left isolated like so:

Then, the '8' clue in the Geradeweg can no longer be satisfied by going into the Yajilin because of the loop segment in R9C5 of the Simple Loop grid going down. Thus, the loop segment must go horizontally through the '8' clue just stopping short of the '3' clue. This and the corresponding chain deductions on the Simple Loop side lead to


Then, again a similar deduction. If the loop segment in R7C8 were to go right, then the cell in R5C9 would be left isolated again. So, it goes up and following this, we can make our first deduction on the Maxi-Loop grid.


Then, the loop ends in R7C8 and R7C9 cannot connect, so using that information and more chain deductions, we get


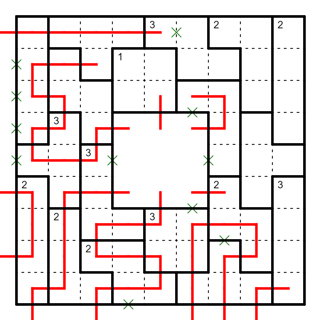
Lastly, we can then carry out some chain deductions on the Maxi Loop grid, keeping in mind that the maximum length through each region.

Room Haisu and Solving the Simple Loop
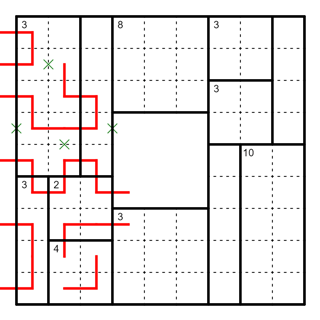
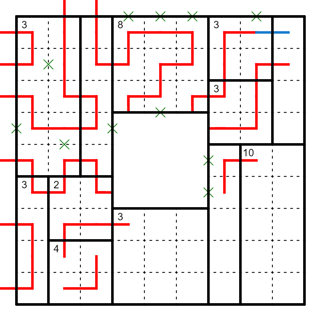
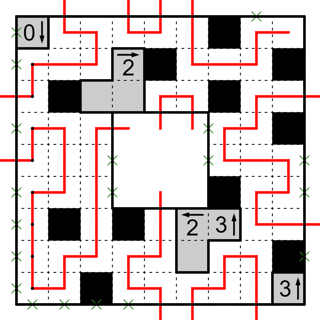
We next turn our attention to Room Haisu. We use a Slitherlink clue to start off. (Note that solving the Masyu resolved some clues for the Slitherlink). The '3' clue at the vertex of R6C3 and R7C3 of Slitherlink can only be resolved in one way, so we get our starting position as shown below.


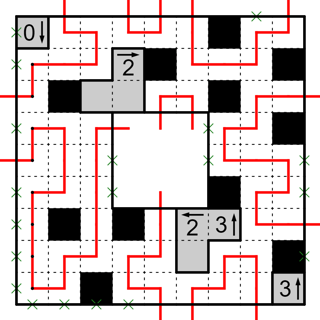
Then, look at the 2 x 2 region marked with a '3' at the bottom middle. Since the number indicates the number of times a room is entered, for such a region, the loop will pass through 1 cell for 2 entrances and pass through 2 cells for the last entrance. The cell R7C6 must be part of the 2 cell group since it must go either left or right. So, the cell in R8C5 goes to the left and down, which enters the '2' region twice. So, we can complete this region and also have some eventual deduction for the '3' L-shaped region just above.

Then, this resolves the top portion of the Simple Loop,

which in turn results in the following deductions for the Room Haisu.

Then, observe that the loop end in R1C6 must go up (otherwise, there will be a small loop formed in Room Haisu. This leads to a series of deductions along the edge of the Room Haisu and Simple Loop that results in the near completion of the Simple Loop.


Finally, the loop segment in R2C2 in the Maxi Loop grid cannot go to the left as it will form a small loop otherwise. This resolves the Simple Loop.


Geradeweg and Room Haisu
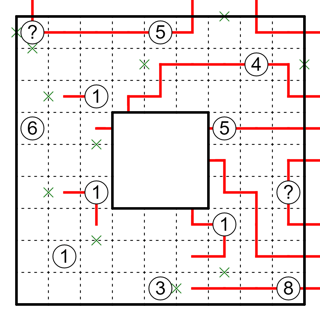
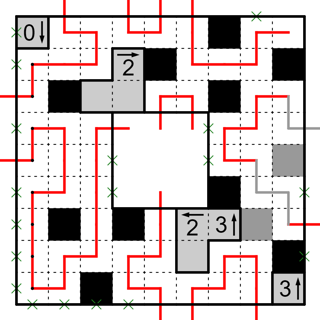
Next, for the Geradeweg area, the '4' clue can only be resolved horizontally and it is blocked to its right, so it must extend 3 cells to its left. Doing so resolves the '5' clue above it as well.

Now, the '?' in the Geradeweg has been resolved to be a '5', and it must extend into the Room Haisu area. Using these deductions from the Geradeweg grid, we get to the following grid for Room Haisu.

Then, carrying on with simple deductions, we get to

Solving Detour with Yajilin
We look at Detour next. From previous deductions, we are at the current stage:

Now, the loop end in R7C3 is the only turning point for that region and it can only go down. This forces some deduction that resolves the bottom half.

After that, look at the '1' region in R1C1 to R1C3. That region must have only 1 turn. However, the turn can't be in R1C1 or R1C2 as it would cause that region to have 2 turns when the loop segment meets the loop end in R1C3. So, after that, we can get here.

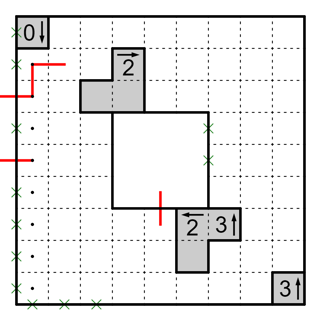
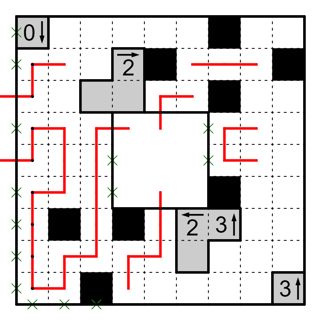
Then, we look at Yajilin next. The current grid looks like

Then, we realise that R5C7 cannot be a black cell as it would leave an isolated cell in R6C7 otherwise. Therefore, R6C7 must be a black cell. After that placement, R4C7 cannot be a black cell as well for similar reasons. That means the remaining two black cells in C7 are in R1C7 and R3C7. This means R2C6-8 all cannot be black cells, which resolves that row's requirement for black cells. We can also resolve the black cells in Row 7. After all the chain deductions, we get till here

The last step gave us some new links in the Detour area and we can resolve that area now easily.

Solving Country Road and Room Haisu
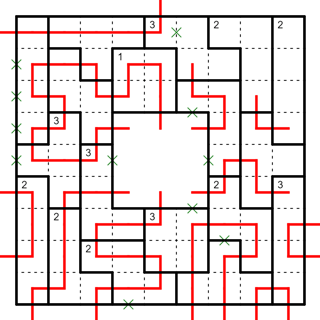
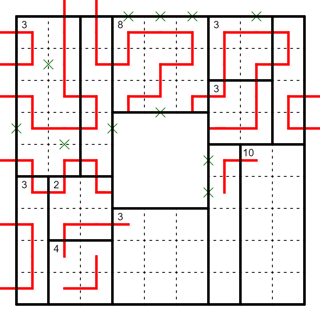
We next move on to Country Road. The grid for that currently looks like

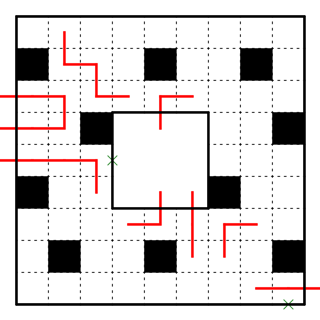
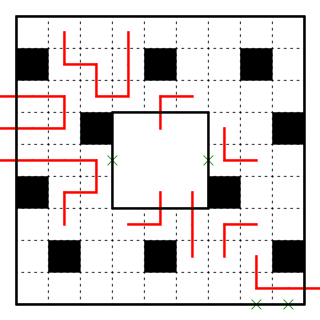
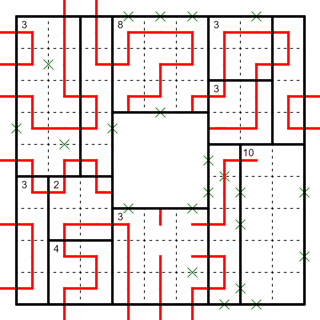
Then, the top part of the puzzle can be resolved first, using the region marked '0' (since the areas adjacent to it must have the loop pass through it). Also, note that the loop segments in the top left cannot meet with each other as it will close the loop too early otherwise.

Then, we can employ similar logic to solve part of the bottom of the grid.

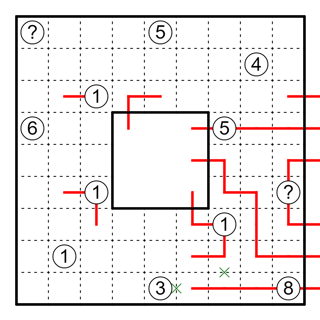
Then, we move back to the Maxi Loop. The grid now looks like this,

which in turn forces these deductions on the Room Haisu.

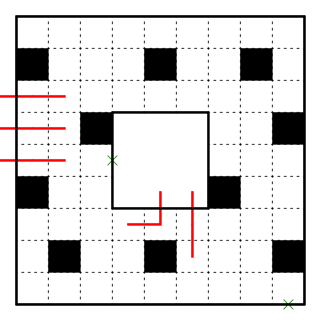
After that, note that for the '8' region of the Maxi Loop, there must be one segment that only passes through one cell through this region. This must be a corner cell with both segments pointing away from the region and this can only be the lower right corner. A similar argument holds for the '3' region right next to it.

This then fills in the remaining cells for the Room Haisu.

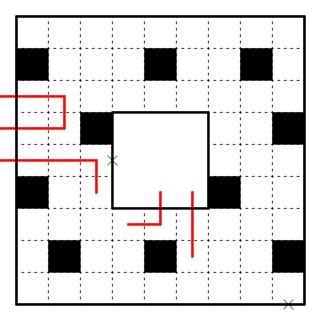
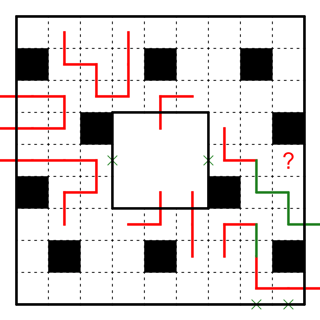
Then, we return back to Country Road. From the previous deductions in the Maxi Loop grid, the current grid looks like this

Now, the loop end in R5C3 cannot go directly down as it will cause two empty cells in different regions to be adjacent. So it must go left and then down, after which the rest of the grid is also filled.

Dutch Loop
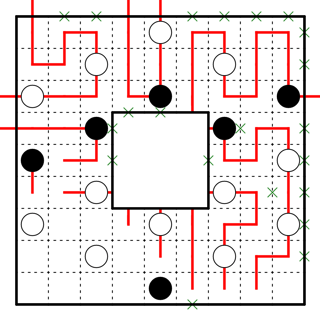
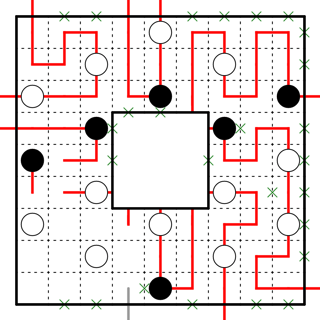
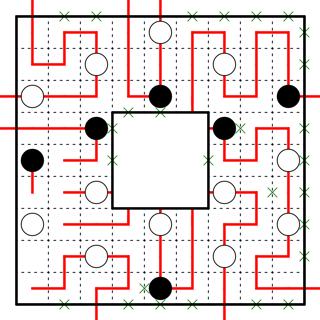
Now, we begin on the last untouched puzzle: Dutch Loop. The current grid from the previous deductions look like this:

Then, following some easy deductions by just making sure the loop passes through every cell, we get to

After that, notice that if the loop goes through the white circle in R2C3 horizontally, then either R1C3 or R3C3 would end up being isolated. As such, the loop must go through that vertically.

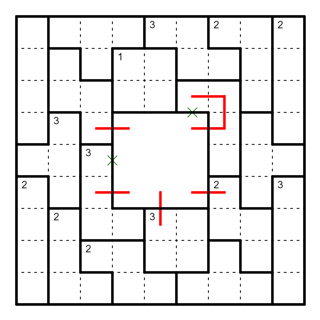
Now, we return back to Room Haisu and Maxi Loop because we need to make a global deduction. Look at the two blue segments below.


If you trace the path from any of the two blue segments, you will find it leads back to the other blue segment. Currently, these two segments are next to each other, so they cannot meet with one another


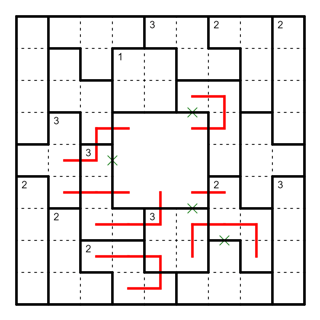
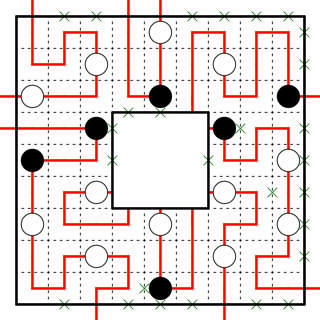
This leads to the following deductions on Dutch Loop.

Solving Geradeweg
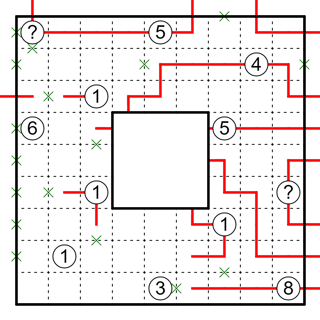
Currently, the grid for Geradeweg looks like this.

Then, the '6' clue can only be resolved by the loop segment going through it vertically. After that, there is a series of deductions using connectivity logic and making sure not to close the loop too early.

This forces some deductions on the Dutch Loop side.

The final clue to resolve in the Geradeweg is the '3' at the bottom. This '3' cannot extend horizontally, so the loop must go through it vertically. However, from the previous Yajilin deductions, the '3' can only extend one unit length downwards, so it must go 2 units upwards. Also, in order to prevent adjacent black cells in Yajilin, the loop end in R9C3 must go left and then down.

The current grid of Yajilin as a result now looks like:

Finishing up with Maxi Loop, Yajilin, and Dutch Loop
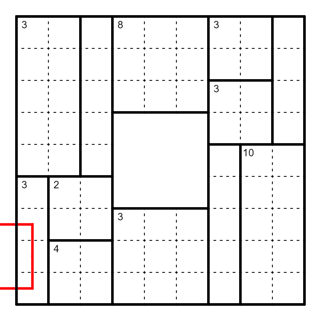
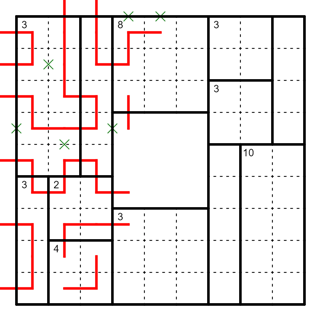
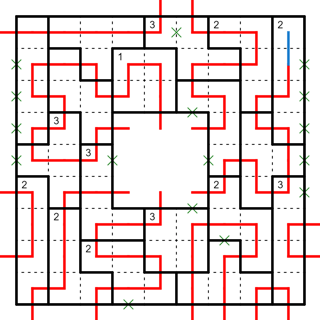
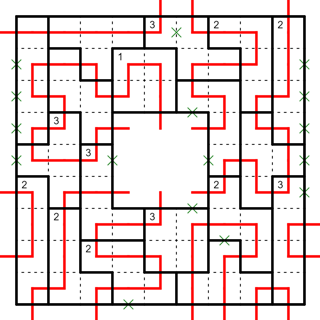
Now, let's look back at Maxi Loop. The current grid looks like

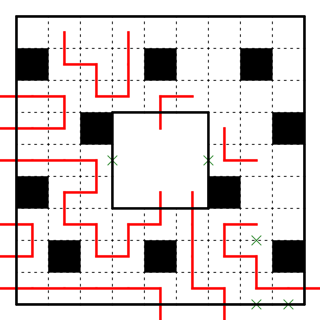
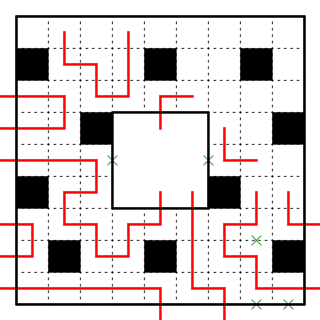
Since the lower right region needs to have a length of 10 through its region, there are certain points from which it cannot exit (marked with an 'x'). Based on that we can make deductions.

Now, the loop segment in R7C7 cannot go down as a segment of length 4 will form in the '3' region next to it. So it must go left. After that, the loop segment in R7C4 cannot go left and R9C4 will be left isolated. So, it must go down.

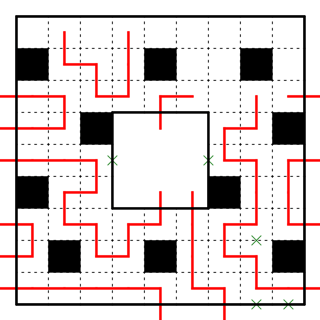
This then forces some deductions on the Yajilin side, which in turn forces some deductions back on the Maxi Loop side.


Now, on the Dutch Loop side, the segments marked in blue are part of the same loop.

Hence, if the loop segment from the black circle goes down to the Yajilin side, then it will eventually connect with the other loop segment and close the loop too early. After that, on the Yajilin side, we need to find the last black square in C9. If the black square was in R5C9, then we get the following contradiction:


Now, the white circle in R8C3 of the Dutch Loop cannot be resolved either vertically or horizontally without leaving an isolated cell. In Yajlin, the black cell also cannot be in R6C9 as R5C9 would be left isolated then. Therefore, the black cell must be in R4C9 of Yajilin.

This in turn leads the following deductions on the Dutch Loop side.

At this point, the loop segment cannot go horizontally through the white circle in R7C1 as it would cause R8C1 to be isolated. With that, the Dutch loop is completed.

This also completes the last remaining cell of Yajilin

Finally, for the Maxi Loop, we know where the loop segment passing through the '10' region ends now, so we can fill that in. After that, the loop segment in R7C6 and R8C6 cannot meet with one another as it will close the loop too early, so they should both extend to the left and that completes the puzzle!
